Showing posts with label Recipes. Show all posts

Thursday, November 4, 2010

We've moved!

Expat Kochen has moved - check out www.expatkochen.com for more!

Dear Foodie Friends,

Extra, extra, read all about it: Expat Kochen has a new address!

Going forward, each new post, chock full of helpful tips, inspiration and colorful photos, will be available at http://www.expatkochen.com. Be sure to bookmark our new URL or follow Expat Kochen with Google Friend Connect. You'll find this option in the right-hand sidebar of the new website. Following our blog means that you'll be notified each time Expat Kochen shares a story, posts an event or tempts you with a delicious recipe. Make sure you don't miss out!

So, come on over to http://www.expatkochen.com. Drop us a line in the comments section to let us know you've made it!

See you in the kitchen,
The Expat Kochen Team

Inspiring you to cook, wherever home may be...

Thursday, August 26, 2010

Is that a banana in your basket?

Then, let's make some banana bread!

Banana Bread in Basel, Switzerland

At my local Migros yesterday I came across a bunch of brown, spotty bananas hiding in the 1/2 price bin. The thought of eating overly ripe bananas alone causes my nose to turn; however, mashing them up for a loaf of sweet bread or cake causes me to fist pump. SCORE!

I really do love banana bread and have tried many, many recipes. My favorite might have to be Smitten Kitchen's Jacked Up Banana Bread recipe. Ahhhh, that one was good. (I prove it, here.) I'm also a fan of the recipe found in The Joy of Cooking. But this time I decided to try out a recipe given by one of my new go-tos for everything food related—David Lebovitz.

You can see Mr. Lebovitz's original Banana Bread (though he calls it cake) recipe here; however, I found myself editing it a bit to work around what I had on hand. The result: a very satisfied stomach and way more than the recommended amount of potassium for the day. :)

Banana Bread in Basel, Switzerland

Banana Breake (you know, BREAd + cAKE?)

1 1/2 cups (210 g) flour
1 teaspoon baking powder
1/2 teaspoon baking soda
1/2 teaspoon salt
1 teaspoon ground cinnamon
1/2 cup (150 g) sugar
2 tablespoons olive oil
4 tablespoons strong espresso
1 large egg white
1 large egg, at room temperature
1 1/2 cups (375 ml) banana puree, made from about 3 very ripe medium bananas
1/2 cup (125 ml) natur yogurt
1/2 teaspoon vanilla extract

Butter a 9-inch square pan or two small loaf pans and line the bottom with parchment paper. Preheat the oven to 350F (180 C).

1. Sift together in a bowl the flour, baking powder, baking soda, salt, and cinnamon. Mix in the sugar.

2. In a large bowl, mix together the olive oil, espresso, egg white, egg, banana puree, yogurt and vanilla.

3. Make a well in the center of the flour mixture and stir in the wet ingredients with a spatula until mixed; stop when any traces of flour disappear.

4. Scrape the mixture into the prepared pan and bake for 40 minutes, or until the center feels lightly-springy and just done.

5. Cool on a baking rack.

Enjoy!

Tuesday, August 10, 2010

Coming up Carrots

The seeds we at Expat Kochen planted back in May are beginning to share their magic. While we've had lettuce greens all summer, the tomatoes, carrots and onions are finally here! It feels (and TASTES) wonderful to supplement our Swiss farm-fresh produce with veggies we actually grew ourselves ... with a little help from the sun, soil, worms and rain.

To celebrate the bounty, I've been eating lots of crisp salads and savory omelettes. (A little not-well-hidden secret: when it's warm, I don't like to spend much time sweating over the stove.) My favorite omelette right now contains green onions, gruyere cheese, salsa verde and CARROT GREENS. Oh, those healthy and delicious carrot greens that you might be prone to throw away add a bright flavor to an otherwise ordinary meal. Add a dash of salt and fresh ground pepper, serve over a bed of field lettuce -- it's a quick and nutritious almost heat-free menu.

For a beautiful plate of rich orange hues, try a tasty salad of diced carrots, orange peppers, tomatoes and nectarines. The juice of the ripe fruits complements the sweetness of the vegetables, making this a salad that requires no dressing. So light! For a little protein, a scramble of eggs, mushrooms, sausage and herbs on the side ... or the above-mentioned omelette!

Monday, July 5, 2010

Un Poquito de México recipes

Strawberry Gazpacho

2 medium cucumbers
3 cups strawberries
1 T fresh lime juice
1 green onion
2 T good olive oil
hot sauce
salt
chives

Peel cucumbers, hull strawberries, and clean scallion. Roughly chop all three and blend (blender or food processor) slightly with rest of ingredients except chives. Do not over process – you want a coarse texture. Taste for seasoning, adding salt and hot sauce as needed. Refrigerate till ready to serve, garnishing with chives.
Serves 4 or 8 as tapas.


Mango Salsa

2 mangos, cubed
3 T grated ginger
1 hot pepper, finely chopped
juice of 1 or 2 limes
pinch of salt

Mix ingredients together and serve. Great for dipping or with steamed fish or fish tacos.


Black Bean salsa

1/4 cup olive oil
1/2 cup red wine or apple cider vinegar
1/4 cup sugar
1 small fresh chile, seeds removed, minced (or 1/4 tsp cayenne powder)
1 t chile powder
ground pepper to taste
1/2 cup chopped cilantro (or to taste)
1 medium red onion, chopped
2 cups (or 2 cans) black beans, drained
1 cup (or 1 can) whole corn, drained
1 can diced tomatoes in own juice (or 1 cup chopped tomatoes, including all of juices)

Mix ingredients together and let rest for at least an hour before serving so flavors mix together.


Roasted Salsa

6 medium tomatoes
1 hot pepper
3 cloves garlic
salt to taste

Preheat a cast iron skillet over high heat and cook the tomatoes and jalapeño until charred, turning occasionally. Peel garlic and smash with salt making into a paste. Put all ingredients into a bowl and roughly chop to make this rustic salsa. Salt to taste.

Note: This can be a great base. Add onions, cilantro, lemon or lime juice, etc.


Tortilla Soup

2 cups Salsa de Molcajete (see above)
8 cups stock (chicken or vegetable)
1 – 3 dried Ancho, Guajillo, or other peppers
3 green onions
3 tomatoes
2 bell peppers (any or many colors)-chopped
avocado cut into strips or chunks
cilantro
lime & lemon wedges
tortilla strips (can be fried if desired) or chips
crème fraîche

Put dried peppers in boiling water and soak for 20 minutes. Chop and blend with salsa. Add mixture into soup pan with stock. Simmer for 20 minutes or longer, adjusting seasoning to taste. Chop onions, bell peppers, avocado and cilantro. Put into small serving bowls along with lemons, limes, tortilla strips and crème fraîche to be added to soup as desired.


Refried Beans

1 cup dried beans
1 onion, chopped
2 cloves garlic, minced
2 t cumin
5 slices bacon or chunks of salt pork (optional)
salt & pepper to taste

Soak beans overnight. Drain soaking liquid, then place in a medium sized pot and add water to cover. Add onion, garlic cloves, cumin, and bacon or salt pork. Simmer for about 2 to 3 hours or until beans have softened, adding water as needed. Salt and pepper at the end to taste.

Refry
1 onion, chopped
1 clove garlic, minced
cumin to taste
1 T olive oil

Sauté onion and garlic in olive oil, then add beans and more cumin to taste. Smash with potato masher to desired texture. Add water if needed to keep them soft in the skillet.


Tortillas

2 cups masa (white corn flour)
1/2 teaspoon salt
1 1/4 cups water

Whisk masa and salt together. Add water and mix thoroughly for about two minutes. If dough feels dry, add more water, 1 teaspoon at a time. Divide dough into 16 equal balls. Line the tortilla press with 2 thick pieces of Saran wrap. Press until 5 or 6 inches in diameter. Carefully peel off wrap. Cook in hot ungreased skillet for 50 sec or longer then turn. Cover with dampened cloth to keep warm.


Agua Fresca

1 small, ripe melon (musk)
1 tray ice cubes or 1 1/2 cup water
sugar, depending on preference.

Peel melon and blend fruit in standing blender or with a stab mixer. Add splashes of water to assist with mixing. Taste the juice – if it is to tart or bitter for your preference, try adding just a bit of sugar, mix again. Adjust to your liking. Once thoroughly blended, transfer to pitcher and add ice (or remaining water). Stir and let sit for approximately 15 minutes before serving. Stir again immediately before serving.

Friday, May 21, 2010

Sangria Tasting, Indoor Sunshine, part 2


5 Sangrias on a cold winter's day...wait a minute, wasn't that supposed to be a warm breezy day on the patio? Well, yes that would be the time one would traditionally think Sangria, but we didn't let the rain and dark clouds stop us. We just created more indoor sunshine, this time with a group of women in a small Swiss kitchen, open to trying a twist on traditional Sangria recipes.

What did we learn? That we like white and rosé Sangrias, and might even consider dressing them up and taking them out. Out of the pitcher, that is, and into the cocktail or champagne glass to serve them for brunch or as an aperitif. We learned that we like herbs in our sangrias, and that while some of us aren't so sure about coffee as a flavor enhancer, some of us who like coffee found it oddly satisfying!

We had a great evening, and hope that we helped to carry in the sunshine and warmth. The weather forecast finally has something beyond clouds and coolness for the first time in, well, weeks. So while we didn't have the warm weather for the tasting perhaps it was just in time to escort in the sunny weekend. 24 degrees (75 Fahrenheit), we are ready.

In case you have the weather for Sangria, here are the recipes for what we tasted. Remember that these recipes are really a starting point, perhaps an inspiration. Taste along the way and add/adjust to make them your own unique creations.

Sparkling Pear Sangria

1 bottle Prosecco
4 cups Schweppes Pear Lime (or sparkling pear cider)
3/4 cup orange liqueur
3/4 cup pear brandy
2 cups grapes, mango, raspberries, or other fruit

Combine orange liquer, pear brandy and fruit. Refrigerate for several hours to let flavors meld. Add Pear Lime Schweppes and Prosecco and serve immediately.

Basil Peach Sangria

3/4 cup sugar*
1 cup loosely packed basil leaves
3 1/2 cups peach nectar
Juice of 1 lemon
1 bottle light white wine (such as Pinot Grigio, nothing with oak)

In a saucepan combine the sugar, basil leaves, half the peach nectar, and lemon juice. Bring to a simmer, crushing the basil leaves with the back of a spoon to release their flavor. Simmer just long enough to melt the sugar, then remove from the heat and allow to cool. Strain the basil mixture into a pitcher filled with ice cubes. Pour in wine and remaining peach nectar. Stir briefly and serve.

*Note: Most of us agreed that we'd add less sugar to this recipe, 1/3 to 1/2 cup should be plenty.

Vino Francesca

1/3 cup honey
1/3 cup boiling water
15 sage leaves plus more for garnish
1 bottle rosé
Lemon twists for garnish

Stir honey into boiling water until dissolved. Add 15 sage leaves and muddle them with a wooden spoon. Let syrup cool slightly then strain into a pitcher pressing hard on sage leaves.

Pour in rosé and stir well. Serve over ice, garnishing with remaining sage leaves and lemon twists.

Jon's Red Sangria

1 orange, 1 lemon, sliced thinly
2 liters (8 cups) red wine
1-2 tablespoons sugar
2 cups sparkling water
Pinch of coarse dark roast coffee*

Put fruit slices in a large pitcher and pour wine over fruit. Cover pitcher and refrigerate overnight. Just before serving add the rest of the ingredients. Serve over ice. This recipe can be easily adapted to white sangria using white wine and stone fruits, and yes, coffee!

*Coffee acts as flavor enhancer

Thanks to my friend Jon in Cleveland Heights for this recipe!

Sonda's Red Sangria

1 liter (4 cups) red wine
2 cups orange juice
1/2 cup Triple Sec
1/4 cup brandy
2 cups ginger ale*
Fresh fruits and berries

Combine all liquids except ginger ale and refrigerate overnight. When ready to serve add ginger ale and fruit. Serve over ice.

Thanks to Sonda, Erin's mom, for this recipe!

*For a great homemade ginger ale recipe, check out the following -


Cheers!

Friday, May 7, 2010

Peanut Butter (and so much more) Cookies

Delicious Eggless Peanut Butter Chocolate Chunk Cookies

A few nights ago I was surfing the internet, checking up on my favorite food bloggers, when I developed a serious hankering for some baked goodness. (Gasp! Mouthwatering shots of yummy food at 10 pm—no wonder I was in need of a sweet treat!) Well, I wasn't in very good form, technically speaking, because I quickly began a cookie dough before realizing I was out of a key ingredient—egg. Thankfully, here at Expat Kochen we don't much like technicalities and we definitely don't feel the need to follow the rules OR the recipes, for that matter. So what was I to do but persevere, sans egg.

I adapted a delicious Peanut Butter Cookie recipe from Smitten Kitchen and it turned out fantastich!

Bonus! This recipe can be vegan friendly by using a butter substitute such as margerine or olive oil (or Earth Balance for the US foodies). Just use water and carob chocolate, or omit the chocolate all together. Pick up a jar of peanut butter at your local Migros or Globus, many times found with the jams and jellies. Also, I LOVE almond butter but havne't seen it in Switzerland, or even our neighboring France or Germany. Stay tuned as I try my hand at using the readily available ground almonds to make my own!
**All tips and hints welcome, please. :)

Mmmm, lecker!

Delicious Eggless Peanut Butter Chocolate Chunk Cookies

Lecker Peanut Butter Cookies

1 1/4 cups all-purpose flour
3/4 teaspoon baking soda
1/2 teaspoon baking powder
1/4 teaspoon salt

1/2 cup unsalted butter, softened
1 cup peanut butter at room temperature
3/4 cup sugar
1/2 cup raw sugar or firmly packed light brown sugar
1 tablespoon water or milk
1 teaspoon vanilla extract

1 chocolate bar, chopped
1/2 cup chopped nuts

3 tablespoons sugar for covering dough

Preheat oven to 350F / 170c
  • In a small bowl, combine the flour, baking soda, baking powder and salt. Set aside.
  • In a large bowl, beat the butter and the peanut butter together until fluffy.
  • Add the sugars and beat until smooth; add the water and the vanilla extract.
  • Add the flour mixture and beat thoroughly (you may need an extra tablespoon or so of water if dough is too dry.
  • Stir in the chocolate chunks and chopped nuts.
  • Place remaining 3 tablespoons sugar in a small bowl or on a plate.
  • Create rounded teaspoon-sized doughballs; roll dough in sugar to coat.
  • Place onto ungreased cookie sheets, leaving a few inches between for expansion. Using a fork, lightly indent with a crisss-cross pattern but don't flatten cookies.
  • Bake for 10 to 12 minutes. Do not overbake. Cookies may appear to be underdone, but they are not.
Cool the cookies on the sheets for 1 minute, then remove to a rack to cool completely.

Sunday, April 25, 2010

Lecker Schoggi!! (yummy chocolate, Basel style)


Recently I had a chance to tour the Brändli Confiserie chocolate making facility. I cannot call it a chocolate factory, because it resides in a lovely old, not so big house in Basel. It was quite amazing to wander from room to room, imagining this as the home it once was, then seeing the output of chocolate and other treats that now come from the same space.


It felt like I was in a multi level home kitchen filled with sweet smells. The chocolates and pastries, sandwiches, are all made by hand. As the chocolates come through one of the few machines they have, still dripping with chocolate, a worker uses a fork of sorts, pictured below, to comb lines into each individual chocolate piece. When you eat a Brändli chocolate, know that it is made with Swiss precision, care and craft. It can seem a pricey treat, but for knowing what went into the making of it. Worth every penny, or Swiss franc, in this case.


Below see the nibs of chocolate, seeds that are transformed into such beautiful, delectable creations.


Some armies of chocolate bunnies...


It was like a small, beautiful version of Willy Wonka's factory.


Do consider a visit to one of their stores for a special treat. The original store is on Barfusserplatz (info listed below). It is a great stop if you are exploring Basel or playing tour guide. Lecker! (yummy). Or check out their website for other locations, Brändli Confiserie.

Öffnungszeiten
Mo.10:30 - 18:30 Uhr
Di. - Fr.08:00 - 18:30 Uhr
Sa.09:00 - 18:00 Uhr
Anschrift


Confiserie Brändli AG
Barfüsserplatz 20
4051 Basel
Tel: +41 61 261 70 33


The Expat Kochen team was inspired to do a little gourmet chocolate making ourselves. At the Walker Art Center in Minneapolis, (I lived in the twin cities before moving to Switzerland) I had tasted several varieties of chocolate bars, including the Salty Dog. I love the addition of salt, cherry peppercorns, chilies, and other unusual ingredients to chocolate, but especially the salt.

And so we melted chocolate in a bowl over hot water (bain marie), poured and smoothed it onto parchment paper, sprinkled and swirled in this and that, then cooled it in the fridge. Broken into bars, each one a unique shape and size, they are beautiful to wrap in cellophane as gifts or simply enjoy with afternoon coffee.


Take a look around your kitchen and see what might be interesting to throw in. Try adding in some fleur de sal (it is divine). Let your creative spirit go, then let us know about your favorite combination!

Tuesday, March 23, 2010

Breadmaking the Easy Way recipes

And now the how to...we began with No Knead Bread, adapted from Jim Lahey, Sullivan Street Bakery, NYC. Mark Bittman made this bread famous when he wrote about it in the New York Times in November of 2006.

No-Knead Bread

3 cups all-purpose or bread flour, more for dusting
1/4 teaspoon instant yeast
2 teaspoons salt, more if using sea salt

In a large bowl whisk flour, yeast and salt. Add 1 3/4 cups water and stir until blended. Dough will be shaggy and sticky. Cover bowl with plastic wrap (or I use a dinner plate) and let it rest for 12 - 24 hours at room temperature.

When dough is dotted with bubbles, dough is ready to turn out. Lightly flour a work surface and place dough on it. Sprinkle more flour and fold dough on itself once or twice. Cover with plastic wrap or a dishtowel and let rest while you heat the oven. (Note: original recipe called for a second rise here - leaving it about 2-3 hours until doubled in size. I almost always skip this second rise and still have great results. Try it both ways and report back to us, please.)

Heat oven to 230 C/ 450 F degrees. Put a large (2.5 liter, 2.5 quart) heavy covered pot in the oven as it heats - 15 minutes or more if you have the time. (Use cast iron, Pyrex, or ceramic. Note that original recipe calls for much bigger pot, but I find even a bit smaller works). Flour dough again if it is at all sticky. Using a bench scraper or spatula, slide dough off work surface into hands and place in heated pot. Shake pan to evenly distribute dough. Cover with lid and bake for 20 - 30 minutes, till bread is cooked through but still pale. Remove lid and bake another 15 - 20 minutes till crust is golden. Cool on a rack

For original article, recipe and some "fine tuning," check out the following sites

http://www.nytimes.com/2006/11/08/dining/08mini.html

Then we made our pita dough and while it was rising made tortillas.


Pita Bread
10 - 15 pita rounds

1 tablespoon honey
1 packet (2 teaspoons) active dry yeast
1/2 cup warm water + 1 1/2 cups warm water
4 cups all purpose flour plus some for dusting
1 teaspoon salt
olive oil

Combine yeast with honey and 1/2 cup warm water and let stand for 10 minutes to activate the yeast

Whisk together 3 cups of the flour with the salt, then add the yeast mixture. Add 1 more cup of flour and the other 1 1/2 cups water and mix. Knead the dough on a floured surface for about 5 minutes. Dough should be a bit sticky. If it is dry add more water, 1 tablespoon at a time

Lightly oil a clean bowl, add dough and lightly oil it also. Cover with a dishtowel and let rise for about 2-3 hours. Ideally it should have doubled in size. Then put the dough again on a floured surface and roll it into a rope, approximately 2 - 3 inches/5 cm in diameter. Cut into 8 to 15 pillows, depending on desired size. Arrange on a floured surface, cover and leave for 10 - 30 minutes

Heat oven to 450 F/ 230 C degrees, put the rack on the bottom, and preheat your baking sheet. Using your hands or a rolling pin, roll the pillows out into circles, but not too flat. When the oven is ready arrange pita circles on sheet and cook for 4 -5 minutes, until bread is puffed. Repeat with remaining dough.


Flour Tortillas

4 cups flour
1/8 teaspoon baking power
1/2 cup shortening (butter also works

Work the above ingredients together with fingers until consistency is like meal.

1 1/2 teaspoon salt
1 cup warm water

Mix water and salt, then drizzle into flour mixture adding warm water as needed to form a ball. Let it rest 20 minutes. Shape dough into rope and cut into 8 - 12 pieces, depending on desired size. Roll out as thin as possible (and then roll thinner). Heat pan to medium/medium high. Cook tortilla for 15 - 20 seconds on one side then flip and continue turning every 15 seconds until lightly browned. Tortillas can be stored in a sealable bag and reheated in the oven.

And for our last and quickest bread, back to Mark Bittman. From his cookbook, Quick and Easy Recipes, comes "Fastest French Bread" for those last minute, ok, last hour pinches. As he says this one is not the "best bread you've ever eaten, but it's the fastest yeast bread imaginable, and it's better than anything you can buy at many supermarkets." Great for that little extra you need with soup or salad, or as a gift.


Fastest French Bread

3 cups all purpose flour, more for dusting
2 teaspoons salt
1 teaspoon yeast
1 1/4 cups water

Whisk together the flour, yeast, and salt in a bowl or food processor. Add 1 1/4 cups of warm water all at once, stirring with a wooden spoon or with the machine on. Continue to mix, for a minute or two longer by hand, for about 30 seconds total with the food processor. Add water by the tablespoon if necessary, until a ball forms.

Shape the dough into a flat round or long loaf, adding only enough flour to allow you to handle the dough. Put the dough on a baking sheet or a well floured pizza peel. Let it rise in the warmest place in your kitchen, covered, while you preheat your oven to 425 F/220 C degrees. If you have time let the dough rise for an hour or so.

Bake the bread on the sheet, or slide it onto a baking stone. Bake until done, 30 - 45 minutes; the crust will be golden brown, crisp and firm.

We also sampled beer bread made from the following classic recipe.

Beer Bread

3 cups / 375 g all-purpose flour (up to half whole wheat / wholemeal flour)
4 1/2 tsp / 15 g bake powder (one envelope)
1 tsp salt
3 Tbsp raw sugar
1 beer (12 fluid ounces or 330 ml)
3 Tbsp melted butter
  1. Preheat over to 180 C / 350 F. Lightly grease a 9x5 inch/ 23x12 cm loaf pan.
  2. In a large mixing bowl, combine flour, baking powder, salt and sugar.
  3. Pour in beer. Stir until a stiff batter is formed.
  4. Scoop batter in prepared loaf pan. Pour melted butter over top of batter.
  5. Bake in preheated over for 50 to 60 minutes, until knife inserted into center of loaf comes out clean.
Note: One German-sized beer of 0,5 l is ideally suited for making a double-batch of bread, or alternatively, make only one loaf when you're in the mood to drink the other half of the bottle. The type of beer influences the flavor of the bread, so have fun experimenting with different beers...we have plenty of great ones to choose from in this region!

Saturday, February 27, 2010

Thai Coconut Pumpkin Soup

Pumpkin was on special at my neighborhood Migros, so pumpkin soup was on the menu this week. I love soup and pumpkin soup may just be my favorite. I have tried several recipes and variations over the years, and the ones I go back to all have a kick. The light sweetness of pumpkin balances well with the spiciness of curry or cayenne. My husband was working on taxes this week, so to show my support I let him choose the soup: Thai Coconut Pumpkin Soup. This is my westernized and simplified version of a recipe from Judy Bastyra’s Thai: the essence of Asian cooking. Now, I share my recipe with you!

Ingredients:

1 Tbsp vegetable oil

1 large onion (2 Swiss-sized onions), diced

2 cloves garlic, pressed

1 lemongrass stalk, chopped (or 1 Tbsp dried lemongrass)

2 fresh red chiles, diced (or 1 Tbsp red pepper flakes)

600ml/1 pint/2 ½ cups vegetable broth

1/3 large pumpkin, cubed

400ml/14 ounces coconut milk

2 Tbsp Thai fish sauce

2 tsp raw sugar

salt and freshly ground black pepper

Optional: ¼ tsp cayenne pepper


Directions:

1. Peel and dice vegetables.


2. Sautee onion in oil over medium heat for three minutes. Add garlic, lemongrass and chiles; sautee additional minute or until fragrant, without burning.


3. Add vegetable broth and pumpkin. Bring to a boil, then lightly simmer for ten minutes until pumpkin is tender.

4. Mash pumpkin to desired consistency with potato masher. (Alternatively, one can use a blender to completely cream the soup.)


5. Add coconut milk, fish sauce, sugar, and salt and pepper to taste. Heat through until almost at a simmer—about five minutes.

6. Serve in bowls and garnish with chiles, lime or basil leaves, or lemongrass.

Tuesday, February 16, 2010

Gnocchi & Tomato Sauce

Homemade Gnocchi
adapted from Rouxbe.com recipe
Serves 4 - 6
4 medium potatoes, boiled and peeled
2 cups flour
4 egg yolks
1/2 teaspoon sea salt or 1/4 teaspoon table salt
1/2 teaspoon nutmeg
1/4 teaspoon white pepper
Additional flour as needed

Begin by ricing your potatoes and spreading them evenly on your work surface.
Then sprinkle the potatoes with a generous amount of flour. Aerate them by cutting into them using a bench scraper, incorporating the flour. Sprinkle the nutmeg and white pepper over the top, and aerate again. Beat the egg yolks slightly and then pour over potatoes. Cover with more flour, then cut and lift again using the bench scraper, until eggs are incorporated. Pick up some dough in your hand. If it is sticky add more flour and continue process. Once it holds together slightly but isn't sticky, it is ready. Shape it into a rectangle, then fold it in half a few times.
Flatten it out to about the height of your finger, add a bit more flour, then let rest for 5 to 10 minutes.
Next cut the dough into strips and separate, sprinkling more flour on them. Roll strips into ropes about the size of your finger. Cut across strips forming pillows. Gnocchi can be left as pillows, or shaped by putting your thumb into the middle of the pillow and pushing down, then rolling the gnocchi piece toward you. That creates a little pocket which holds nicely onto sauce or cheese. You can do this on a gnocchi paddle for ridges, or get creative and use something around the kitchen with a nice texture.
Once cut and shaped, sprinkle yet a bit more flour, then cover with a towel until ready to cook.
They can also be frozen at this point; simply put onto a tray so they don't touch each other and freeze. Once frozen you can put them into a freezer bag to store for up to two months.

Basic Tomato Sauce
(and butter, inspired by smittenkitchen.com, orangette.blogspot.com, and many others!)

1/2 medium onion
4 large cloves garlic
4 cans diced tomatoes (28 oz or 880 grams)
5.5 oz or 156 grams tomato paste
1/4 cup olive oil
2 tablespoons butter
salt to taste

Dice the onion and émincé (thinly slice) the garlic. Heat a heavy bottomed pot over medium low heat, then add the olive oil and pinch of salt. Sauté the onions until soft and barely golden. Add garlic and cook for about a minute, then stir the tomato paste and cook until the color deepens. Then add the tomatoes, and a bigger pinch of salt. Stir to combine, then cook for 30 to 45 minutes, stirring often. When done stir in butter and season to taste.


Tuesday, February 9, 2010

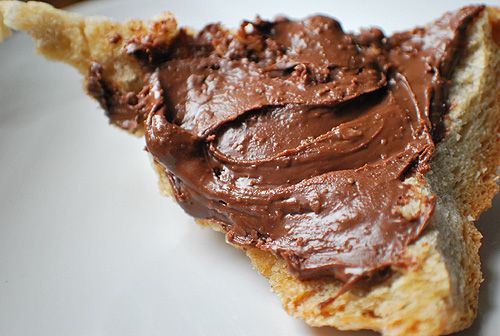
World Nutella Day

World Nutella Day
Happy World Nutella Day, folks! Ok, I'm four days late but in my book acknowledgement within a two week time span of an important date is totally acceptable and still allows for celebration, honor, recognition, etc. of said date. Better late than never, right? Especially in matters regarding Nutella.

If you like chocolate and aren't allergic to nuts I'm going out on a limb here and assuming that you've tried Nutella a time or two.

What, more?     Like multiple times?     Like me!

And if you don't like it, perhaps you know someone who does?

Well I'm a big, BIG fan of spreadable deliciousness—may it be peanut butter, almond butter, hazelnut spread, chestnut spread, if you can spread it I will eat it. I've actually had a thing for Nutella since I first visited Europe at age 16 but didn't eat it on a regular basis until moving to Switzerland. And then, after a few months of eating it I began to question Nutella's ingredients and wondered if, like its cousin peanut butter, it might also contain hydrogenated oil. So I researched, read a few labels and even tried a few bio Nutella-esque spreads. I learned that off-brand hazelnut spreads are just as pleasing to me as the real Nutella and that, while the Nutella sold in Europe does not contain hydrogenated oil (yippee!), the spread available in Canada, the US and Mexico does. Interesting...

World Nutella Day

So you can imagine my excitement today when I learned that February 5th was World Nutella Day, a day encouraging fans to bake, cook and eat Nutella. And that is exactly what I did.
World Nutella Day

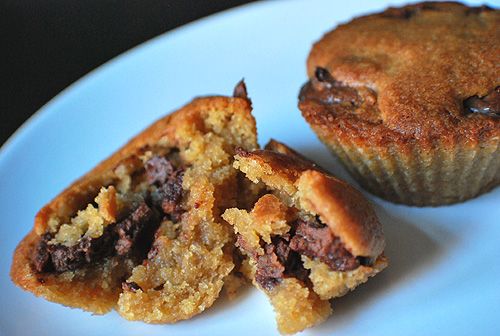
Nutella Blondies
adapted from Smitten Kitchen

8 tablespoons butter, melted
1 cup brown sugar
1 egg
1 tsp vanilla
1 cup flour
Pinch salt
  1. Mix melted butter with brown sugar and beat until smooth. Beat in egg and then vanilla.
  2. Add salt, stir in flour. Mix in any additions, such as chopped nuts, chocolate chips, espresso powder or dried fruit.
  3. Fill cupcake papers or buttered tins half full with batter. Place a dollop of Nutella in the center of each and then cover with additional batter. Bake at 350°F / 175°C for 20-25 minutes, or until set in the middle.

Wednesday, February 3, 2010

Just for Two recipes

Avocados on the Half Shell

1 ripe avocado
1 tsp lemon juice
1 small jar/can of caviar or salmon roe
1 tsp freshly snipped chives
freshly ground black pepper
  1. Cut avocado in half, lengthwise, and separate.
  2. Remove the seed and strip the skin.
  3. Coat avocado in lemon juice to preserve color.
  4. Fill seed hollow with spoonful of roe.
  5. Sprinkle with chives and ground pepper.
Yield: 2 servings


Curry Balsamic Vinaigrette

2 Tbsp balsamic vinegar
2 Tbsp cider vinegar
1 Tbsp honey
1 Tbsp olive oil
2 tsp quality mustard
1 tsp curry powder
optional: ¼ tsp cayenne pepper

  1. Add all ingredients to a jar/bottle and shake well.

  2. Toss with leafy green salad.
Yield: 2-4 servings


Smashed Celeriac

1 medium celeriac
1 Tbsp olive oil
1 handful of fresh thyme, leaves picked
1 clove of garlic
freshly ground black pepper & sea salt
3–4 tablespoons water or stock
2 Tbsp chopped fresh parsley

  1. Peel and dice celeriac into 1 cm/ 12-inch cubes.
  2. Heat large pan on high, add olive oil, then celeriac, thyme and garlic. Sautee for 5 minutes.
  3. Turn the heat down to a simmer, add the water or stock, place a lid on top and cook for around 25 minutes, until tender.
  4. Season carefully to taste and stir around with a spoon to smash up the celeriac.
  5. When serving, top with fresh parsley.
Yield: about 2 servings
Adapted from Jamie Oliver’s Happy Days with the Naked Chef


Seared Duck Breast with Cherry Sauce

2 duck breasts
freshly ground pepper & sea salt

1 tsp olive oil or butter
2 green onions, finely chopped
500g frozen cherries
4 Tbsp red wine
1 Tbsp red wine vinegar
1 sprig fresh rosemary
freshly ground pepper & sea salt

Cherry Sauce
  1. Heat medium saucepan over medium heat. Sautee green onion, salt and pepper in olive oil for two minutes.
  2. Add wine, vinegar, rosemary and cherries. Simmer for approximately 10 minutes, until the sauce has thickened.
  3. Remove from heat and set aside.
Duck Preparation
  1. Using a sharp knife, lightly score the skin of the duck breasts, then rub over with salt and pepper.
  2. Heat a heavy-based pan over low heat. Add the duck breasts, skin-side down, and leave for about 10 minutes until the fat is nearly all extracted and the skin is golden brown and crisp.
  3. Turn up the heat, turn over the duck breasts and cook the flesh side for 3-4 minutes. The meat should feel slightly springy when pressed if you want it cooked to medium.
  4. When ready, remove to a dish and set aside to rest for 5 minutes.
  5. Slice the duck breasts thickly on the diagonal and fan out on to warmed plates. Spoon over the cherry sauce to serve.
Yield: 2 servings


Chocolate Bark

2 medium bars plain chocolate
optional toppings: red pepper flakes, dried ginger, ground coffee, raisins, dried coconut, peanut butter

  1. Break up chocolate bars and melt in a double boiler.
  2. When fully melted remove from heat and set aside for 5 minutes to cool.
  3. Meanwhile, line a baking dish or cookie sheet with parchment paper.
  4. Spread chocolate in thin layers atop the parchment paper, sprinkling in toppings between layers or on top.
  5. Let cool for at least an hour or until hard to the touch. To speed up the process, place in the refrigerator.
  6. Once completely cooled and firm to the touch break chocolate into desired sizes and serve.
Yield: 2-4 servings

Tuesday, December 22, 2009

CCA Event Recipes!

Click here to return to CCA Quick Appetizers and Holiday Drinks!

Appetizers

Caviar Dip
Makes 2 cups

8 ounces cream cheese – room temperature
1/2 cup crème fraîche (or sour cream)
2 teaspoon freshly squeezed lime juice
1 scallion, minced (leek works as well)
1 tablespoon milk or cream if desired
1/4 teaspoon sea salt
Freshly ground pepper to taste
3 1/4 ounces fish roe

Optional: 2 tablespoons freshly minced dill plus sprigs for garnish

Blend cream cheese with mixer or by hand until smooth. Add crème fraîche, lemon juice, scallion, milk, (dill) salt and pepper. Gently fold in 3/4 of the fish roe. Spoon dip into serving bowl and garnish with remaining roe and sprigs of dill. Serve with potato chips, pita chips or crackers.


Napoleons
Makes about 10

3 tablespoons olive oil
1 medium sized, skinny eggplant
1 egg
1 tablespoons milk
1 cup bread crumbs or Panko crumbs
1 medium sized fresh mozzarella ball

Heat oven to 150 C or 300 F. Slice eggplant in thick discs and lay 3 minutes per side on paper towel to absorb moisture. Heat olive oil in a frying pan on medium heat; lightly beat egg and milk in a separate, shallow bowl. Dip each piece of eggplant into egg mixture and then completely coat with bread crumbs. Place eggplant into frying pan and fry on each side until crumb coating is brown and crispy. Place eggplant pieces on baking sheet; place a slice of tomato followed by a slice of fresh mozzarella atop each piece.

Bake for 10 minutes; let cool slightly (enough to handle); serve.


Cheese Truffles
(Cheese Balls, Spread, etc.)
Serves about 12

8 ounces cream cheese, softened
8 ounces goat cheese
4 teaspoon finely chopped onions
1 teaspoon Worcestershire sauce
1/2 teaspoon black pepper
1/2 cup toasted chopped pine nuts, almonds, pecans, etc.
Apples and pears, olives and almonds, figs and apricots or whatever else inspires you from the market choice.

Mix first 5 ingredients together until well combined. Cover tightly and chill for an hour (or up to three days). Now the choices…
  • Put into dish and sprinkle herbs of choice on top (chives, parsley, etc.), then serve with bread, crackers, pears or apples.

  • Shape into large ball then roll in herbs of choice.

  • Roll into 3/4 inch balls then roll each ball in herbs of choice.

Blue Cheese Soufflé
Serves about 8

1 cup shredded cheddar
1 cup crumbled blue cheese
1 cup chopped onion
1 cup mayonnaise
1 egg (you can separate the white and whip, though it works fine with whole egg just beaten)

Grease and flour the cooking dish/dishes. Spoon into ramekins or medium soufflé dish. Bake at 175 C or 350 F degree oven for about 40 minutes - until the top is golden brown. Dip into with baguette slices or toasts.

Click here to return to CCA Quick Appetizers and Holiday Drinks!

Cocktails

Fresco Ice, Swiss Style
Serves 1

4 ounces San Pellegrino
1 1/2 ounces peach nectar
1 ounce johannisberry juice
3/4 ounce fresh grapefruit juice
1/2 ounce fresh lime juice
1/2 ounce Simple Syrup
2 dashes of Angostura bitters
2 thyme sprigs

Fill a cocktail shaker with ice. Add all of the remaining ingredients except 1 thyme sprig and shake well. Strain into an ice-filled glass and garnish with the remaining thyme.

Simple Syrup - MAKES ABOUT 1 1/2 CUPS 
In a small saucepan, bring 1 cup of sugar and 1 1/2 cups of water to a boil; simmer until the sugar is dissolved, 3 minutes. The syrup can be refrigerated for up to 3 weeks.


Bellini

Serves 1

1 part peach puree / juice / syrup
3 parts dry bubbly white wine (Prosecco, Champagne, Sekt, Cremant)

Place juice into bottom of a Champagne glass and add bubbly.


Ginger Martini
(variation of Ginger Candied Martini, below)
Serves 1

1 ounce fresh-squeezed ginger juice
1 ounce triple sec
3 ounces good vodka
1 ounce Lemongrass syrup

Mix in shaker with ice and pour. Enjoy the warmth…add lime juice for more refreshing flavor (think summer).


Ginger Candied Martini
Jessica Riley, Chicago, Il, Mizu Restaurant, Chicago
Serves 1

1 ounce fresh-squeezed ginger juice
1 ounce triple sec
3 ounces Grey Goose vodka
1 ounce pineapple juice
1 ounce Rose's lime juice

Friday, November 6, 2009

Canning nummer zwei

Last week we grabbed a few friends and got together to do some more canning! Going the high acidity route again, this time we opted to use lovely quince which was enjoying the tail end of its season here in Switzerland. We found these beautiful, chunky, perfectly imperfect fruits at the corner store near the Musical Theater in Kleinbasel (Oetlingerstrasse and Rhienring).

Quince Jam, Basel, Switzerland

The colors of this fruit were extraordinary; the radiant yellow peel against the crisp white flesh and neon green tips - just gorgeous. And to top it off, none of us had ever made quince jam before so the excitement factor weighed heavy throughout the entire process!

Quince Jam, Basel, Switzerland

The quince were surprisingly tough to chop so we decided to grate the fruit in order to decrease its cooking time.

Quince Jam, Basel, Switzerland


Quince Jam, Basel, Switzerland


Quince Jam, Basel, Switzerland

Several grated quince later, cooked down with lemon juice and lemon zest, the kitchen smelled wonderful. It was interesting to see the warm color come out in the quince as it cooked. It turned out to be a beautiful deep apricot color when done. The flavor, sweet, tart and tangy.

Quince Jam, Basel, Switzerland


Quince Jam, Basel, Switzerland

Again, we used the same canning process as with the pumpkin butter and plum jam with cinnamon—super easy since quince is an especially acidic fruit. This also meant that the jam turned out to be a bit thick without the use of pectin. Nice!

Quince Jam, Basel, Switzerland


Quince Jam, Basel, Switzerland


Quince Jam, Basel, Switzerland

We found it to be great not only as a jam but also a base for sauces and cooking. It was delicious mixed with some hot sauce for chicken stir fry. Quince Persimmon Duck anyone? Divine. Ahh the possibilities!

By the way we found out some interesting things about quince when planning this cooking event; the word marmelade comes from marmelo which is a Portuguese word for quince, and in Spanish quince is called membrillo and is cooked into a reddish paste called dulce de membrillo. Interesante!

Thursday, October 22, 2009

Adventures in canning

The cold seasons are upon us here in Basel and like so many other cities we're slowly saying goodbye to the plethora of fresh fruits and vegetables at local farm stands and hello to more frequent stops at the neighborhood Migros or Coop. As dismal a shadow this seems to cast on the next 6 months in die Küche, we'd like to keep store-packaged foods to a minimum and our homemade foods going strong. And so we've ventured into the world of canning in a small Swiss kitchen (sSk).

Pumpkin Butter

First up - pumpkin! Both farmer's markets and grocery stores alike have an abundance of pumpkin this time of year and we couldn't think of a more delicious sounding concoction then pumpkin butter. While none of us had made it before, the recipes we found all seemed quite simple so we gave it a shot.


We used this delicious looking (and tasting!) pumpkin from the Gluscht Oase stand at the Riehen market. The gorgeous shades of orange found in their different types of pumpkin were so intense, just beautiful!

After chunking, then steaming and peeling about 3 cups of pumpkin, we pureed it using a nifty immersion blender—such a wonderful kitchen tool, we highly recommend it. Then we added apple juice, some ground ginger, cloves, cinnamon, nutmeg and sugar. Easy!


This lovely concoction cooked on the stove for about 30 minutes; meanwhile, we prepped the glass jars and lids by completely submerging them in water, turning up the heat and simmering them for about 10 minutes.


This process was super easy and the final product was a bit like fall in a jar. Very delicious on toast, morning granola, ice cream, etc. Any other ideas? :)


Thanks to Peter and Lilli Zmoos of Gluscht Oase at the Riehen Market for the beautiful pumpkin/squash, the tips, and for that beautiful gourd he gave to my daughter! (rylla)

Plum Jam with Cinnamon

After a few days of rest and half way through our Pumpkin Butter, we decided to can another fruit of late summer / early fall abundance, the plum.


When the gentleman in Riehen from whom we purchased the plums found they'd be used for jam, he insisted we add cinnamon to the mix. Feeling no ties to one particular recipe on hand, we searched the internet for combinations of plums and cinnamon. Plus, it felt like the right thing to do since a local recommended, rather insisted, on it. In the end, we found quite a few recipes and ended up averaging the results. The ingredients went a little something like this: about 20 medium plums, two cups of sugar, one cup water, one tablespoon cinnamon.


The mixture of chopped plums, water and sugar was beautiful! As you can see, we opted to leave the skins on to get as much 'healthy stuff' in the jam as possible. You know, to balance out the two cups of sugar. :) Oh, and we also used raw sugar which may have produced a bit of a darker tint.


Because of the high content of sugar we made sure to stir frequently and keep the heat on medium as to not burn the mixture.


After cooking for about 30 minutes we skimmed the pink foam off the top, added the cinnamon, taste-tested and simmered for a bit longer. Really, the cinnamon is a genius idea. It tasted so wonderful and definitely added a touch of fall to the batch.


Meanwhile, the jars were prepping in their water bath. None of us have by-the-book canning equipment here in Basel, so we opted for the same quick and easy method used for the pumpkin butter—so easy, just make sure you have kitchen tongs and a few hot pads on hand.


The process was remarkably quick—before we knew it the jam jars were filled to the brim, sealed and sitting on their heads. We read that they must sit this way for six hours, so sit they did. Also, a little note here: at the beginning of canning season Migros had a nice selection of jars and fabric lid toppers complete with cute labels.


We'd love to hear about your canning adventures—any unique combinations out there? Anything you can because it allows you to enjoy your favorite food out of season? Any canning recipes you favor because they hold a special place in your memory bank? Happy canning!